Showing posts with label Nail design. Show all posts

Sunday, 30 June 2013

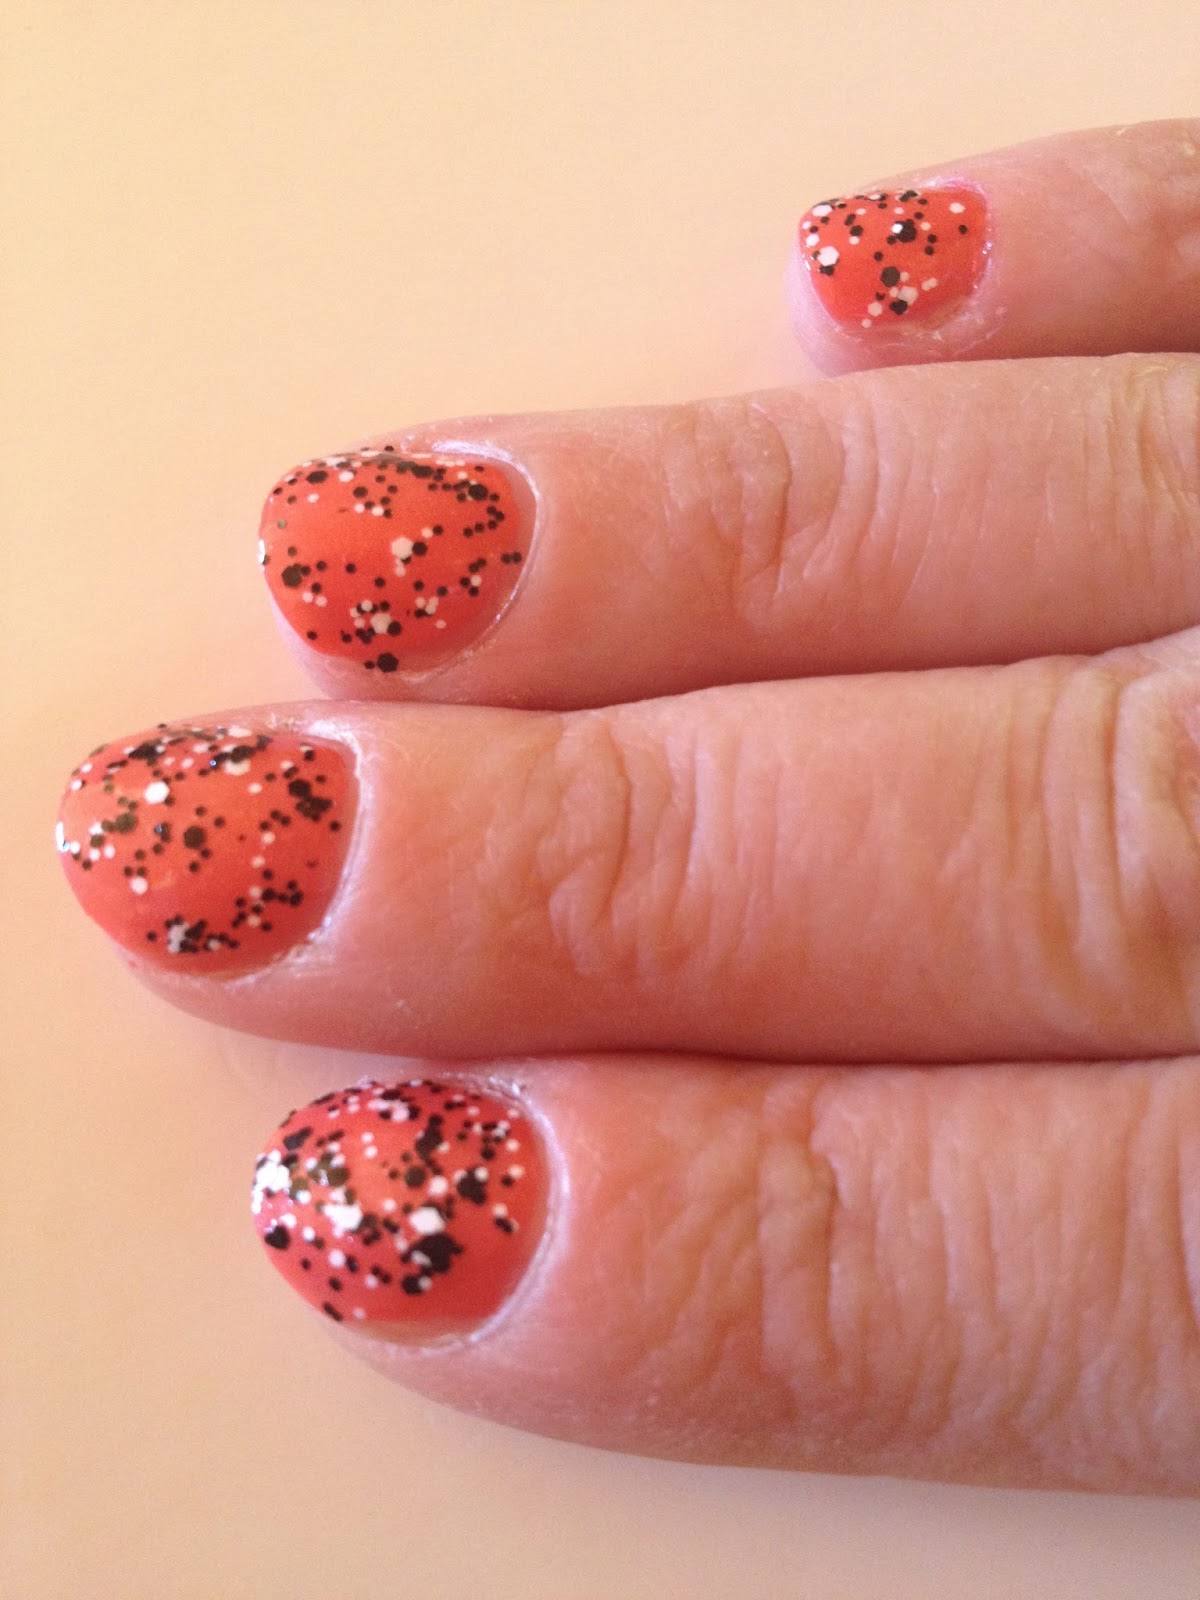
L'Oreal Confetti nails - Take II

Just a quick nail design:

Base Coat: essie 'rock solid'
Colour: nails inc. 'porchester square'
Glitter: L'Oreal '916 Confettis'
Top Coat: Maybelline express manicure 'quick dry protecting top coat'


Because this is such a short post I am adding a picture of my doggies. They were REALLY delighted to go for a walk the other day :-)


Wednesday, 19 June 2013

Gold & Glitter nails

So tomorrow I will be flying over to Germany. Berlin to be precise, to meet up with a few friends.

Of course I had to do my nails today in preparation. I wanted a design which will be maintenance free, if possible. Glitter nails are the perfect solution, because I think glittery nail varnish stays on the longest without chipping.

Base coat: essie 'rock solid'

Colours, Glitter:
1. L'Oreal '106 Versailles Gold'
2. essie 'shine of the times'
3. essence '121 gold fever'

Because of the four layers I didn't use a top coat. Hope that was the right decision.
Just in case, I am packing one nail varnish and nail varnish remover pads. (So handy!)


Summer has come back for a little while to Ireland. Here is one impression from tonight:

Sunday, 16 June 2013

Maybelline forever strong: Pink and orange nails

Felt like bright colours today so pink and orange seemed like the perfect choice!

Base coat: essie 'rock solid'

Main coat: Maybelline forever strong '155 bubble gum' & '460 orange couture'

Top coat: Maybelline express manicure quick dry protecting top coat

Three nails on the left hand are painted pink and two orange. The right hand has three nails painted in orange and two in pink. 
I added some dots on two fingers of each hand, but unfortunately you can hardly see them. 


Thursday, 13 June 2013

Magnetic nail varnish

When I went on holidays last year to the US I bought two magnetic nail varnishes.

Here is one of them:

Base coat: Maybelline express manicure protecting base coat
One thin layer and one thick layer of: Sally Hansen magnetic nail color '908 Graphite Gravity'
Top coat: Maybelline express manicure quick dry protecting top coat

How does it work?

Apply a thin layer of the nail varnish and let it dry for at least 10 minutes.
Next you apply a thick layer of the rich grey nail varnish. It's important to do one finger at a time.
To get the magnetic effect you hold the magnet. which is in the cap of the nail varnish,  over your nail for ten seconds. That will create little waves and looks really pretty and unusual.
Let it dry for a good good while (like 15 minutes or more) and apply the top coat.

That's it! Done and dusted!


Remember my review of essence nail art peel off base? I updated the post today as I had to revise my opinion a little bit! Check it out

Tuesday, 11 June 2013

L'Oreal Dating Coral & Confettis nails

I bought L'Oreal 916 Confettis last week and had to give it a try straight away.

Base Coat: essence nail art peel off base coat (Read my review here. As promised, I am giving it another try)
Base Colour: L'Oreal 305 Dating Coral
Glitter: L'Oreal 916 Confettis (It's actually it really a glitter as the finish is matt.)
Top Coat: Maybelline express manicure

My first impression: I love it! I catch myself starring at my nails all the time ;-)

Thinking of maybe using it on top of a clear nail varnish next time and applying two layers of the confetti.


Monday, 3 June 2013

Pastel colours nails

Sunday = Nail varnish day

Kinda was in a mood for an understated look, so I went with pastel colours

Here we go:

Base coat: essie 'rock solid'
Base colour: L'Oreal '207 babydoll'
Second layer 1: LCN ??
Second layer 2: essie luxeffects 'shine of the times'
Top coat: Maybelline express manicure


Friday, 31 May 2013

Two shades of red nails

So the big weekend has finally arrived where I will be wearing my first ever sewed dress, the Pin Up Dress.

Of course I had to go for a nail design which would be red.

I decided to paint three nails in one red and the other two in another. Also put a bit of gold glitter on two nails of each hand.

Base Coat: essie 'rock solid'
Red 1: Rimmel 60 seconds '320 rapid ruby"
Red 2: essie 'scarlett o'hara'
Glitter: essence colour & go '121 gold fever'
Top Coat: Maybelline express manicure

Now it's time to pack and go road tripping! So so excited!


Monday, 27 May 2013

Red and white polka dot nails

Sunday was my nail design day. Time to get rid of the old one and come up with a new idea.

No, the nail varnish usually doesn't last a whole week. Usually on a Wednesday or Thursday I have to replace it with a quick fix, which is a something like a light pink or nude nail varnish.
No, I never leave the house without nail varnish. Addicted? Yeah, maybe ;-)


Base coat: essie 'rock solid'
Base colour: L'Oreal 211 'Opulent Pink'
Polka dots: Evie Mai base coat 
Top coat: Maybelline Express Manicure

After the pink dried I took my dotting tool and got dotted away ;-)


Thursday, 23 May 2013

Review: essence nail art peel off base coat

I was pretty excited when I found the essence nail art peel off base coat (not a really smashing name, is it?) at my fav nail varnish dealer.
We all know that removing a nail design which involves some kind of glitter is not the most pleasant thing to do! Of course I thought that just peeling the whole glittery mess off the nail should be much easier and also a little bit of fun.

Here is the design I did on Sunday to try the base coat out:


I started with a thick layer of the essence base coat (as described on the bottle). You are supposed to let it dry for ten minutes (until it goes clear) and also not to wash your hands with hot water for three hours after application. So do your dishes beforehand ;-)

The next layer was a nice pink from Rimmel 60 seconds: 619 pulsating

After that had dried I applied the glitter! essie luxeffects 'a cut above' (it's my absolute fav glitter nail varnish! Sooooo good!)

To give it a nice finish I applied a thin layer of Maybelline express manicure quick drying protecting top coat.

I was pretty happy with the finished product!
Today was the day were it had to come off because one of the fingers had started to chip big time.
To be honest I was even kinda excited to peel it all off!

Being a multi tasking girl I did it while walking the dog in the park, so if you are in a park and there is a trail of pinky glittery stuff .....that was probably me.

I can't say that I actually peeled it off! To be honest it took me ages and only little bits and pieces came off. I pictured the whole experience a little different. More like peeling all of the nail varnish off each finger in one go.
Ok, I was walking while doing it but I would say that removing it the traditional way takes just as much time.
I will give the base coat another go soon, but I am not really impressed so far.

UPDATE 12.06.:

I tried it again. This time I applied a very thick layer of the base coat and let it dry for more than 10 minutes. Today was the day to remove the nail varnish and I must say it went quite well.
I was able to peel of big pieces of the nail varnish and also was able to remove it from some of the fingers in one go!
Not so bad after all....It won't go to the bin so and will be used for further glitter nail designs again!